Sample Mirth Connect Project – HL7 2.x Transformation (2.3 to 2.4)
We’ve been working with Mirth since the 1.x days and a lot of common questions come in around how to do a basic HL7 2.x to 2.x transformation. The classic use case is mapping messages within a hospital, from one system to another. Below, we step through the basic process of mapping from a HL7 2.3 message to a 2.4 message. As we do this, we’re making a few changes to the data to meet our destination system’s requirements.
Compared to other Integration / Interface engines on the market, Mirth does a few things differently:
- Mirth generally handles HL7 messages like delimited text, referencing segments and fields like “msg[‘MSH’][‘MSH.3’][‘MSH.3.1’]” (note internally messages are parsed to an XML structure
- When reading a value from the data use the following markup: var X = msg[‘MSH’][‘MSH.3’][‘MSH.3.1’].toString();
- When writing a value to a segment, using the following markup: msg[‘MSH’][‘MSH.3’][‘MSH.3.1’] = var Y;
- There isn’t simple way to visually map from a source format to destination. Most of the time, mapping is done as code
As you’ll see in the example below, the way we’re tackling the transformation is by taking the input message and modifying it, one field at a time.
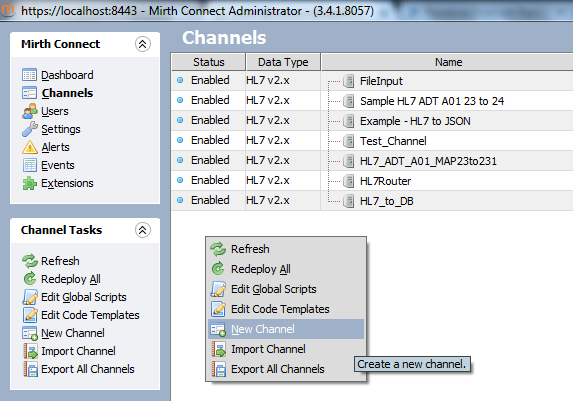
First, open Mirth Connect Administrator and go to Channels. Right click and create a New Channel.
In the Summary Tab, give it a name and set the options you see below. Most should be defaults.
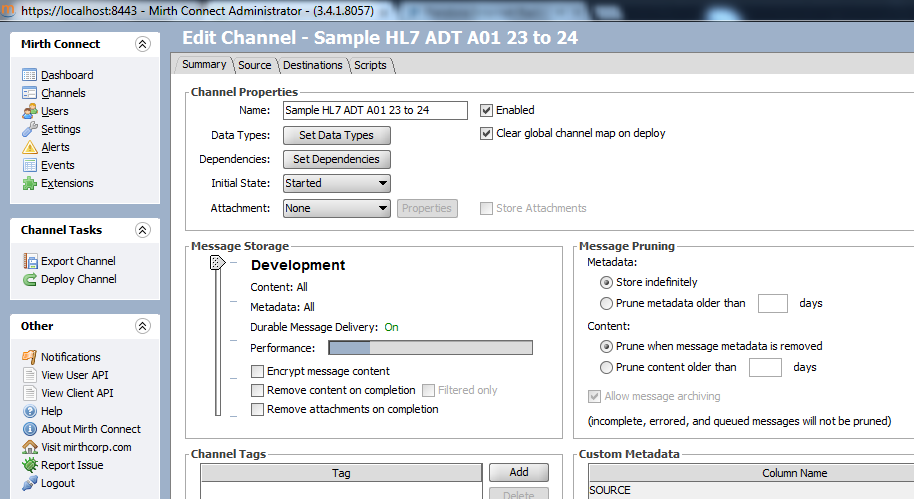
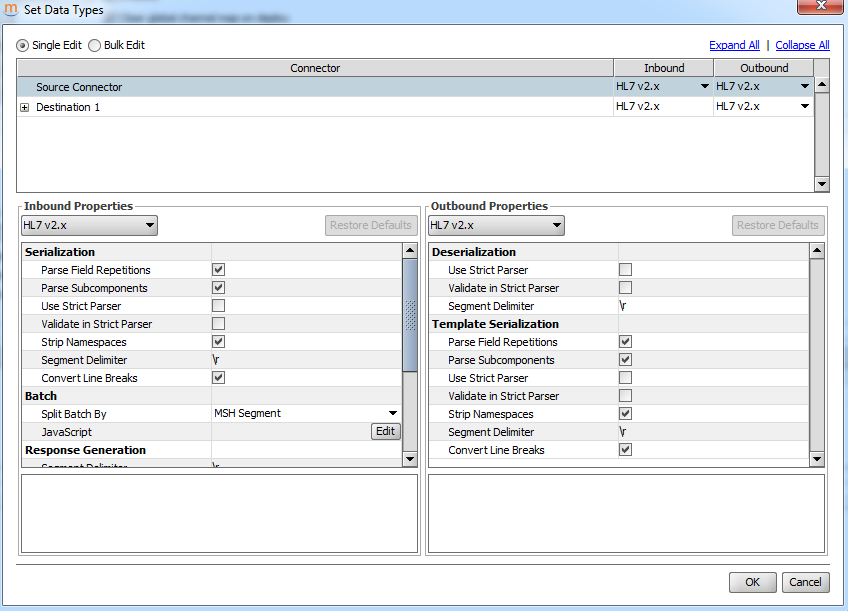
Click the Data Types Button and verify that all data types are HL7 v2.x.
Next, we’ll setup the Source Connector. To keep things simple, we’re going to pick up a file with a HL7 message in it. In the real world, we’d likely be taking it in via TCP/IP (out as well).
Click the Source tab and mimic the settings you see below. We’ll need a folder on our local system that we’ll drop input files to. In this case, we’re using C:\Development\Mirth\In . You can do the same or come up with your own folder structure. You’ll also need a destination folder for the next step. We’ll be using C:\Development\Mirth\Out .

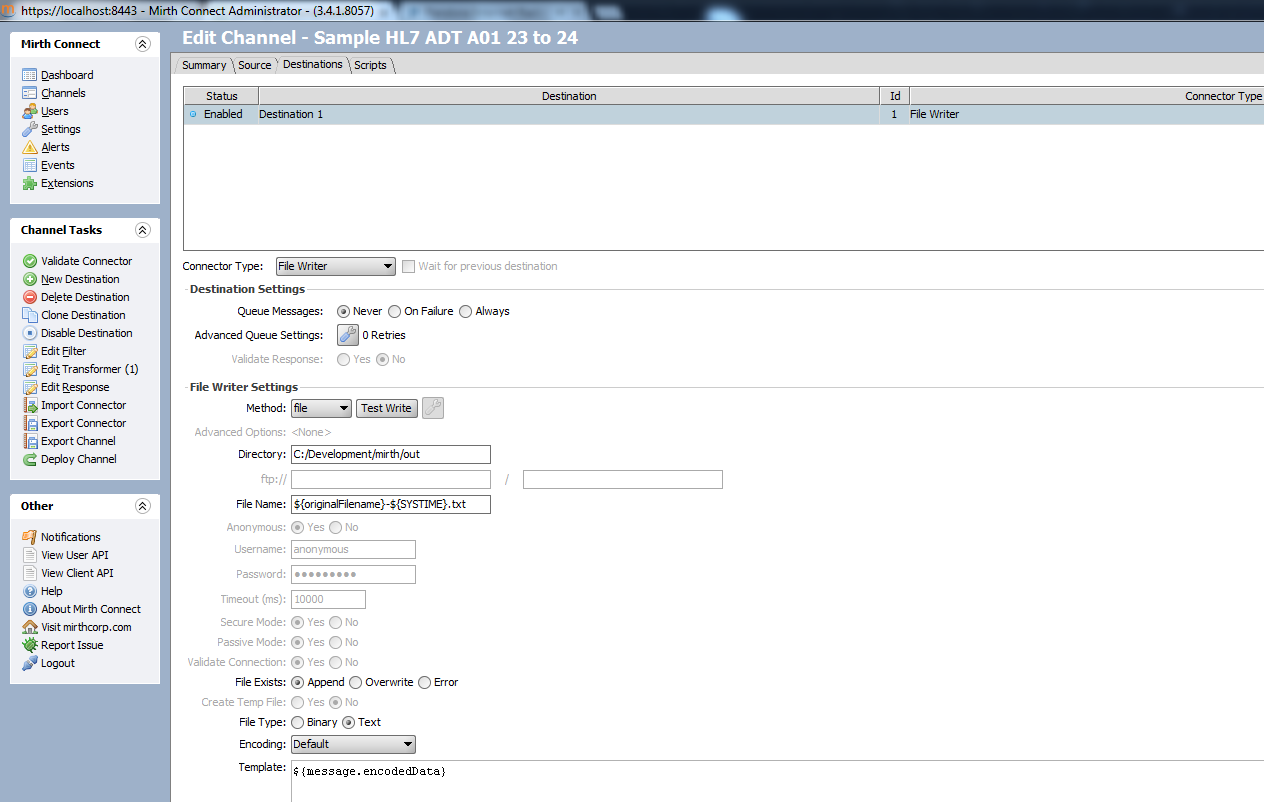
Set the Destination connector as a File Writer. Specify the folder as C:\Development\Mirth\Out (or your own preference). In this example, we’ve also defined an output file name using the variables that Mirth presents. It is crucial to make sure your Template matches below.
Next, click Edit Transformer on the left hand menu. This is where we’ll define the transformation rules.
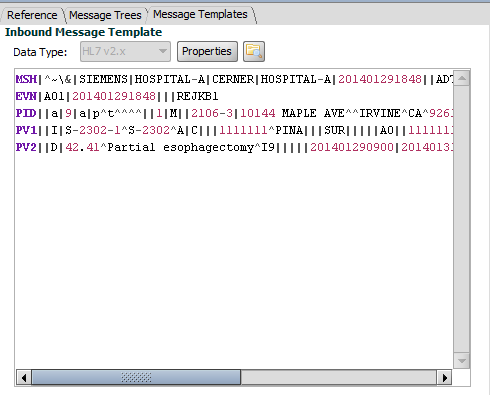
In order to give us a reference for how the data looks, we’ll want to add an Inbound Message Template. Click the Message Templates tab on the right and use this sample:
MSH|^~\&|SIEMENS|HOSPITAL-A|CERNER|HOSPITAL-A|201401291848||ADT^A01|1912340911|P|2.3|||AL|NE|
EVN|A01|201401291848|||REJKB1
PID||ABC123|987654|ALT789|PETTY^TOM^^^^||19781218|M||2106-3|10144 MAPLE AVE^^IRVINE^CA^92614||(949)123-1234|||||0053820452|220675537||AME||||1|||||
PV1||I|S-2302-1^S-2302^A|C|||1111111^PINA|||SUR|||||A0||1111111^PINA|S||S|P||||||||||||||||||IAH|||||201401291848|
PV2||D|42.41^Partial esophagectomy^I9|||||201401290900|201401310900|3|3||||||||||||||||||||||||||
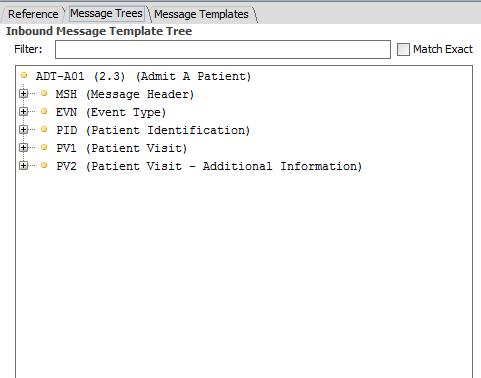
Now, click on the Message Trees tab to view that data in a parsed structure. Mirth will break down the sample data and show it to you as you expand the various segments / fields.
The reason we do this is to have drag and drop access to the proper field names. You can drag fields with a green dot over to your coding window.
Let’s talk about our Use Cases. In this transformation, we have to accomplish a few things:
- Set the HL7 version to 2.4
- Reassign the Sender ID to Mirth
- Update the Date and Time to current in the MSH segment
- Pad the Date and Time with 00’s for seconds in the EVN segment
- Force the Admit Reason to be uppercase
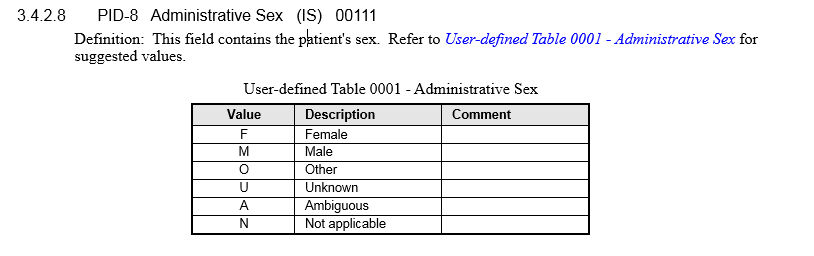
- Enforce a list of Genders for the destination. Essentially, if we hit an unexpected gender, we’ll assign it as “O” for other. The following list is what was translated into the code:
The code below illustrates how the requirements were met.
// revise to version 2.4
msg[‘MSH’][‘MSH.12’][‘MSH.12.1’] = ‘2.4’;
// sender id
msg[‘MSH’][‘MSH.3’][‘MSH.3.1’] = ‘MIRTH’;
// update datetime
msg[‘MSH’][‘MSH.7’][‘MSH.7.1’] = DateUtil.getCurrentDate(‘yyyyMMddhhmmss’);
// Add two digits of seconds if they aren’t there.
if (msg[‘EVN’][‘EVN.2’][‘EVN.2.1’].toString().length <= 12)
{
msg[‘EVN’][‘EVN.2’][‘EVN.2.1’] = PadString(‘00000000000000’, msg[‘EVN’][‘EVN.2’][‘EVN.2.1’].toString(), 0);
}
// Check whether or not gender meets requirements of the destination system. Set to ‘O’ if not.
switch(msg[‘PID’][‘PID.8’][‘PID.8.1’].toString().toUpperCase())
{
case ‘F’:
msg[‘PID’][‘PID.8’][‘PID.8.1’] = ‘F’;
break;
case ‘M’:
msg[‘PID’][‘PID.8’][‘PID.8.1’] = ‘M’;
break;
case ‘O’:
msg[‘PID’][‘PID.8’][‘PID.8.1’] = ‘O’;
break;
case ‘U’:
msg[‘PID’][‘PID.8’][‘PID.8.1’] = ‘U’;
break;
case ‘A’:
msg[‘PID’][‘PID.8’][‘PID.8.1’] = ‘A’;
break;
case ‘N’:
msg[‘PID’][‘PID.8’][‘PID.8.1’] = ‘N’;
break;
default: msg[‘PID’][‘PID.8’][‘PID.8.1’] = ‘O’;
}
// Set admit reason to all upper case
msg[‘PV2’][‘PV2.3’][‘PV2.3.2’] = msg[‘PV2’][‘PV2.3’][‘PV2.3.2’].toString().toUpperCase();
//
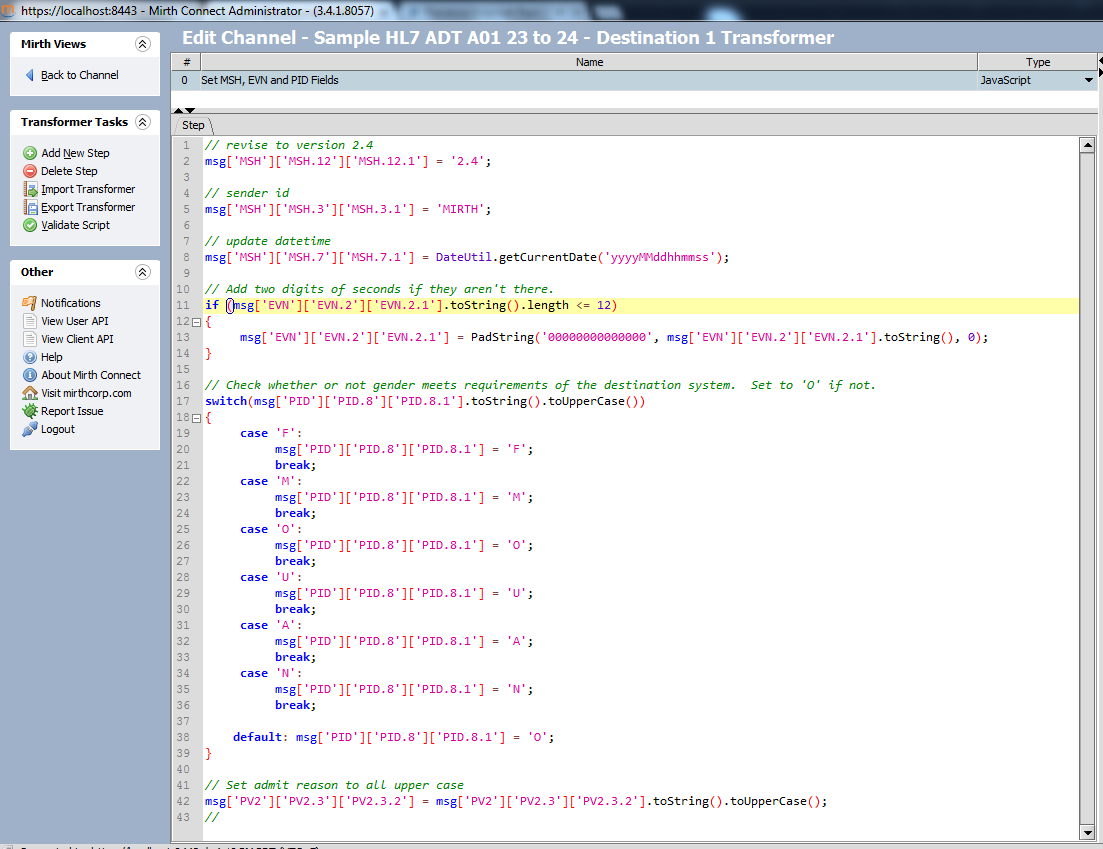
On line 13, you’ll notice that we call a function called PadString. Functions allow us to reuse code across all Channels.
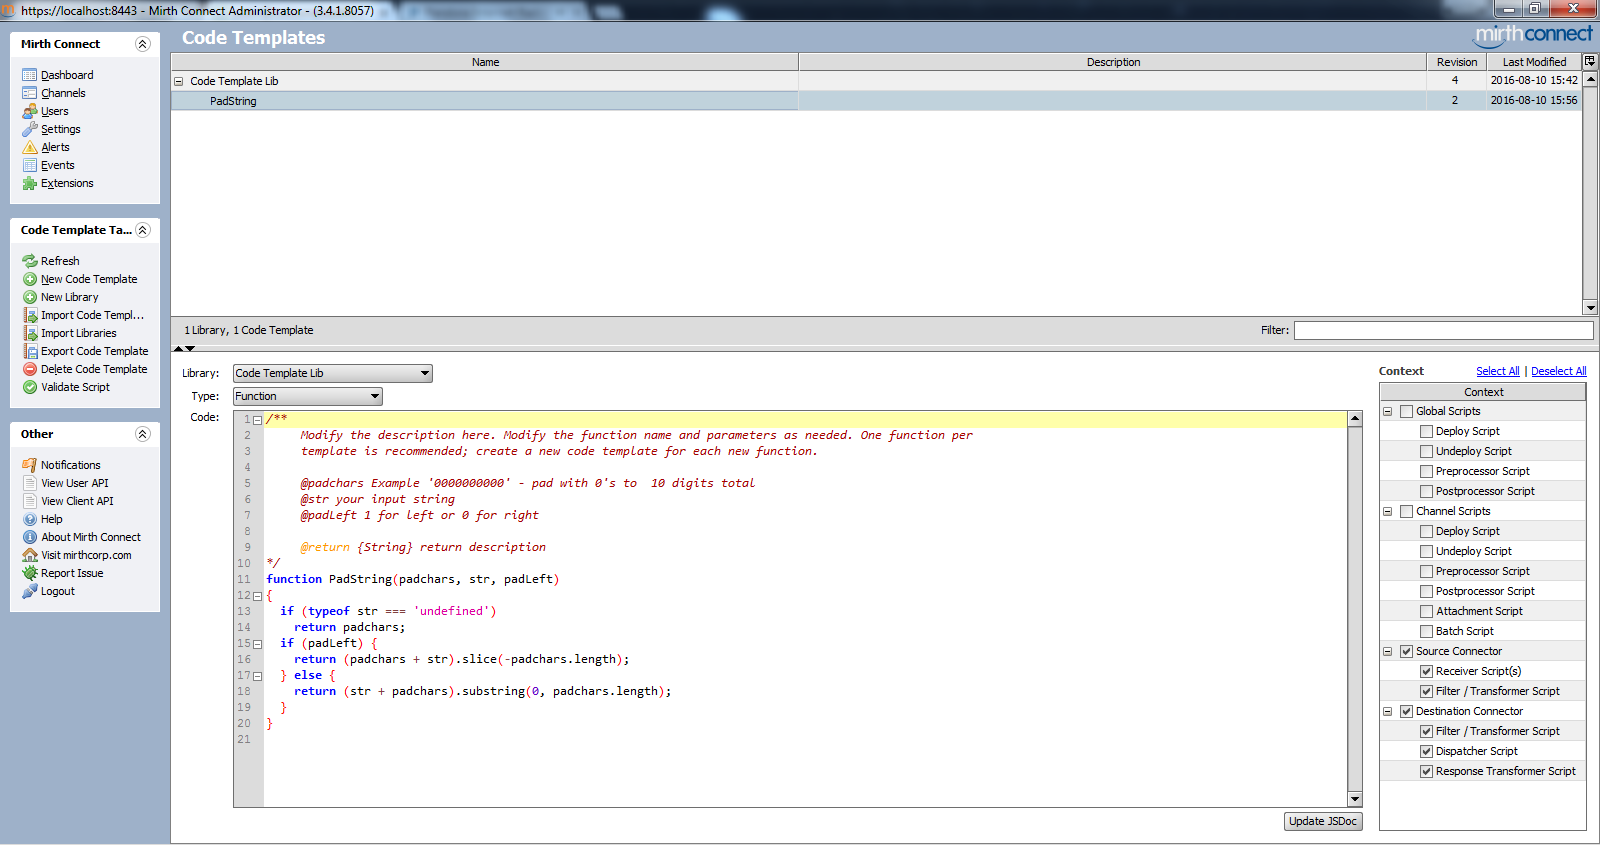
To create the function, go back to the main channels menu and create a Code Template Library, and add the following Template function.
/**
Modify the description here. Modify the function name and parameters as needed. One function per
template is recommended; create a new code template for each new function.
@padchars Example ‘0000000000’ – pad with 0’s to 10 digits total
@str your input string
@padLeft 1 for left or 0 for right
@return {String} return description
*/
function PadString(padchars, str, padLeft)
{
if (typeof str === ‘undefined’)
return padchars;
if (padLeft) {
return (padchars + str).slice(-padchars.length);
} else {
return (str + padchars).substring(0, padchars.length);
}
}
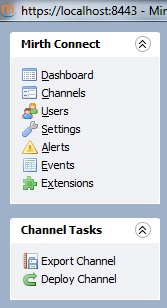
Now, let’s go back to our Channel and Deploy it.
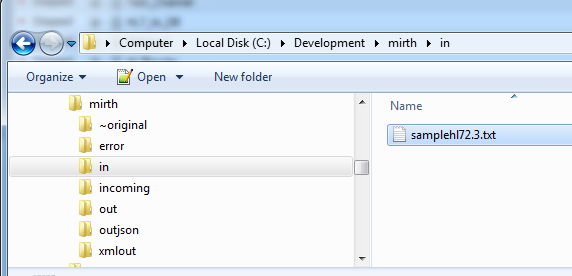
Setup a sample file on your in C:\Development\Mirth\ called SampleHL723.txt . Inside, use the following text:
MSH|^~\&|SIEMENS|HOSPITAL-A|CERNER|HOSPITAL-A|201401291848||ADT^A01|1912340911|P|2.3|||AL|NE|
EVN|A01|201401291848|||REJKB1
PID||ABC123|987654|ALT789|PETTY^TOM^^^^||19781218|M||2106-3|10144 MAPLE AVE^^IRVINE^CA^92614||(949)123-1234|||||0053820452|220675537||AME||||1|||||
PV1||I|S-2302-1^S-2302^A|C|||1111111^PINA|||SUR|||||A0||1111111^PINA|S||S|P||||||||||||||||||IAH|||||201401291848|
PV2||D|42.41^Partial esophagectomy^I9|||||201401290900|201401310900|3|3||||||||||||||||||||||||||

To test this channel, COPY the file you created to C:\Development\Mirth\In . It will get picked up and deleted.
Navigate to your Out folder to see the results. Open it up.
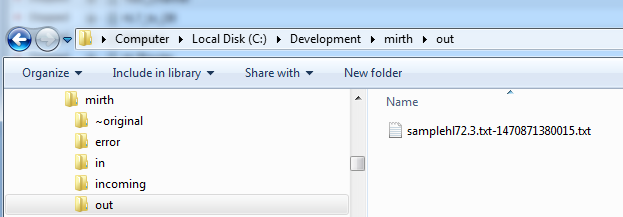
As we can see, our transformation has taken affect
- We see the version is 2.4 in the MSH segment.
- Sender ID now Mirth
- We updated the Date and Time to current in the MSH segment
- We padded the Date and Time with 00’s for seconds in the EVN segment
- Since the Gender was M, it stayed the same. To test this function, change the Gender to “Z” in our input file and test again. The output will be “O”.
- The admit reason “PARTIAL ESOPHAGECTOMY” is now all uppercase
